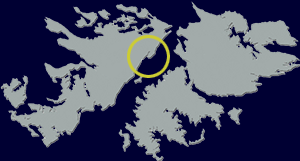
SBS Operations - West Falklands - Port Howard
Dateline : 27th May 1982
Following on from the raid on Fox Bay on the previous night, 8 section SBS, along with the other half (2 men) of the Naval Gunfire Support (NGS) FO1 team attached to them attacked the Argentine presence at Port Howard.
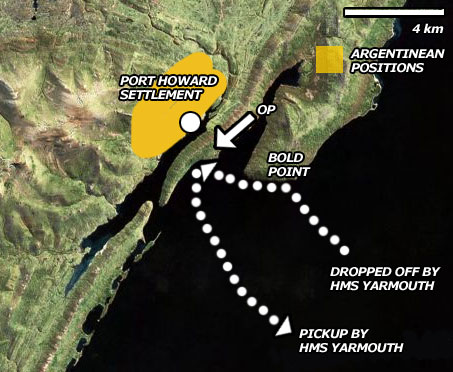
Learning from the previous mission's difficulties with the journey in and out, the SBS elected to use 2 of their own Gemini RIBs as transport. The team of 5 SBS men and 2 NGS specialists set off from HMS Yarmouth at 2330 on the 27th of May. Their drop off point was 3.5 km South West of Bold Point.
As the Geminis approached the coastline, the SBS scanned the ground with several bits of kit that had been taken on the Fox Bay mission but weren't used due to the poor weather. One was a Thermal Imaging device, which the SBS used to scan for the heat given off by enemy positions. This device had previously been used by the SBS to locate the enemy positions atop Fanning Head. Then it had been attached to HMS Antrim's Wessex helicopter, now it was operated by hand. The SBS men also employed image-intensifying night vision devices to probe the darkness for signs of trouble.
Luckily, Bold Point was clear of enemy and the SBS/148 team came ashore on the west shore of Bold Cove. Once on dry land the SBS team checked and secured the area while the NGS team did a radio check.
Under the cover of darkness, the SBS/148 team moved stealthily towards their planned Observation Position (OP). With the SBS providing security around the OP, the NGS men contacted HMS Yarmouth and initiated their pre-arranged fire plan. At 0130, Yarmouth began shelling troop positions around the Port Howard Settlement. Those hit, fire was directed against fuel/ammo stores, anti-aircraft guns and the enemy HQ.
During the engagement, enemy shells landed near the SBS/148 position. It wasn't clear if the rounds were meant for them or if they were trying for HMS Yarmouth, parked out of range off the coast. The NGS team called in fire on the Argentine artillery positions, silencing them. Nearly 300 salvoes had been brought down on the Argentine defenders during the entire mission.
Not wishing to push their luck, and unsure if their OP had been compromised, the SBS/148 team snuck back to where they had cached their Geminis and, under a shroud of mist that was hugging the waters, they headed out to the rendezvous point, where they were picked up by HMS Yarmouth.
Maps of the Port Howard operation:
The mission to Port Howard had been a complete success. Luck had favored the men with good weather which allowed them a relatively easy insertion and extraction (although they did have to use Yarmouth's ship radar to find them at pickup). The dry conditions also allowed the SBS to use their thermal imager and night vision device, which gave them a distinct advantage when approaching potentially dangerous shorelines. Although luck had been kind to them, there's little doubt the skill and professionalism of the SBS and the men of 148 Commando ensured their success. The two SBS/148 missions on the 26th/27th at Fox Bay and Port Howard had caused severe disruption to the main Argentine forces on West Falklands, keeping them tied down and bottled up and unable to interfere with the British actions on East Falklands.